Nova Hits
Realistic Nova 15 (1988) rebuild
Design Goals
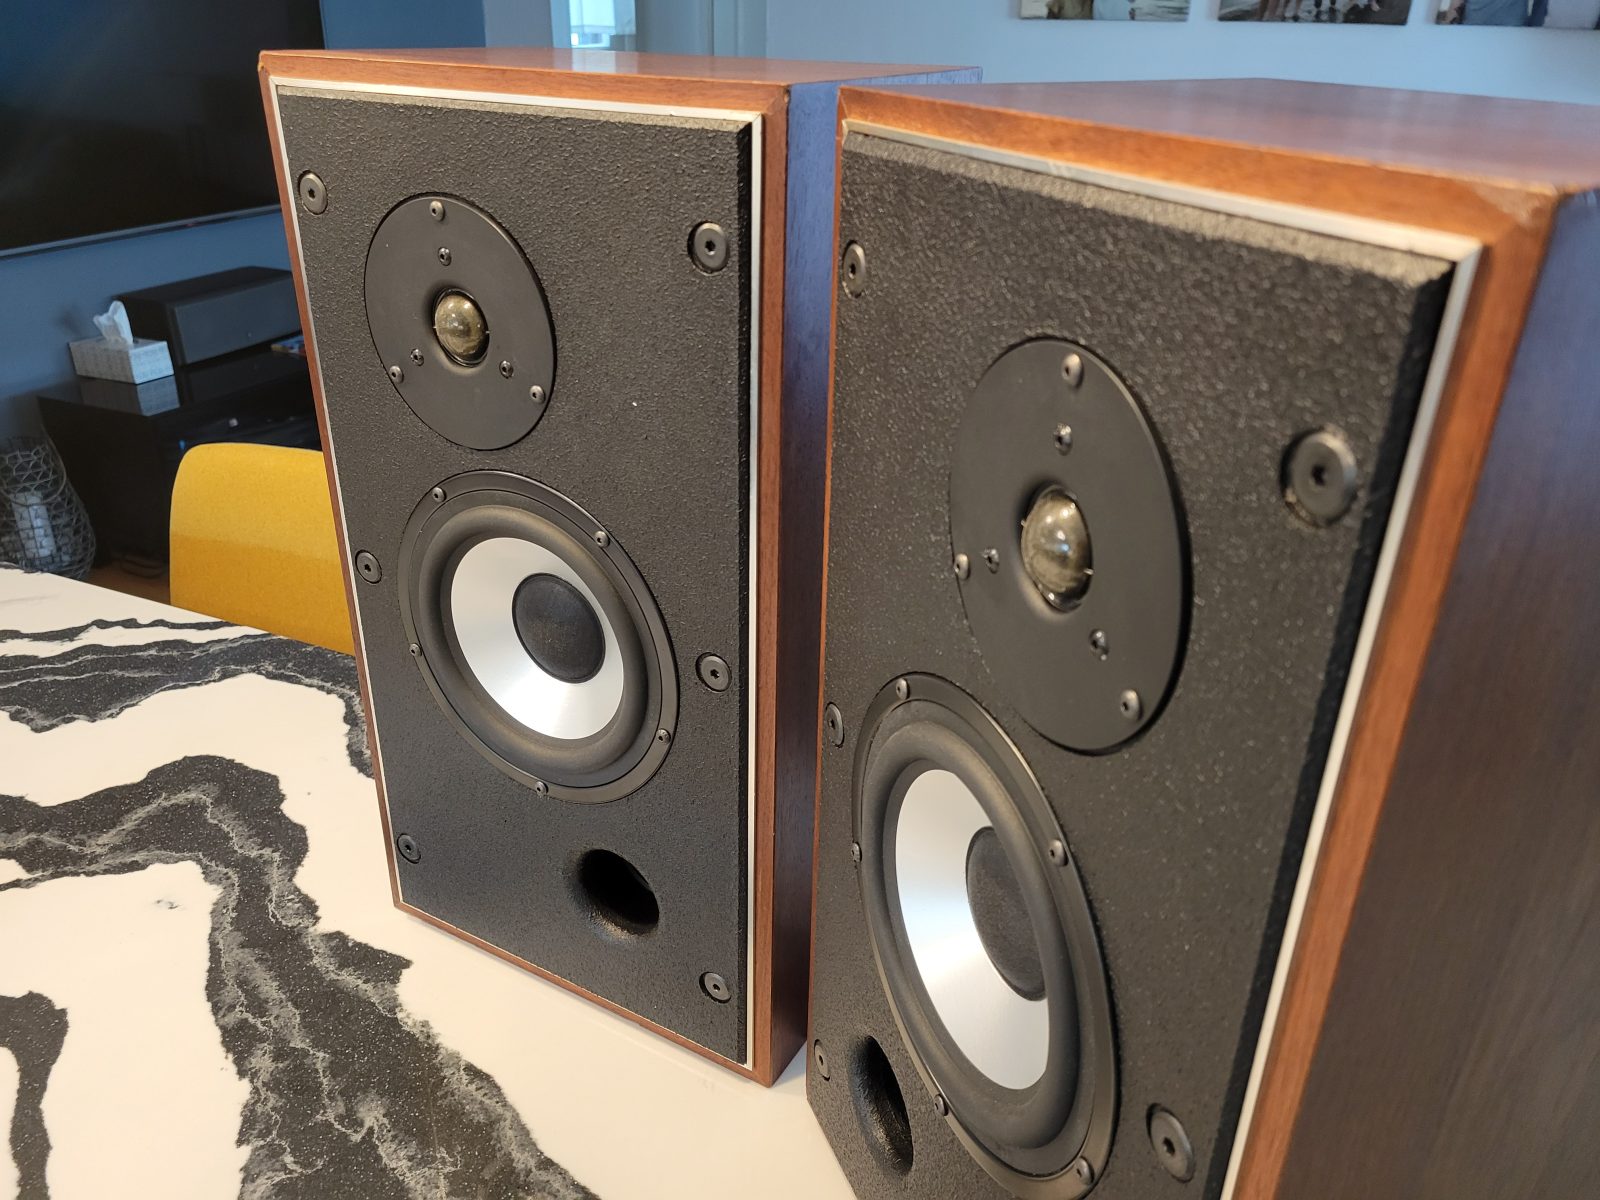
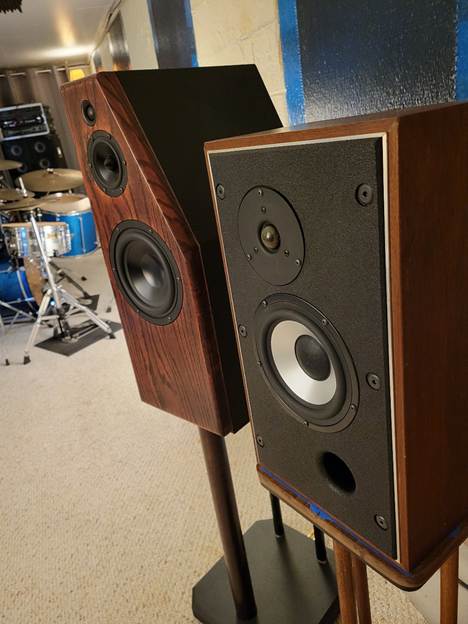
The main purpose of this build was utilize a pair of Realistic Nova 15 cabinets that were my own first set of real speakers. This pair has been with me from my early teenage years, through college and many apartment moves all the way to now. These bookshelf format speakers are still well built for modern drivers with about ½ cubic foot of internal volume. These one’s were repeatedly blown due to abuse and have been living with an MCM 8” woofer replacement, Dayton Silky tweeters, and off the shelf 2 way crossover boards also from Dayton Audio. All of these part updates were installed at least 20 years ago.
The end result will be a classic and inexpensive 2 way speaker with excellent characteristics in an updated vintage format.
Driver Selection
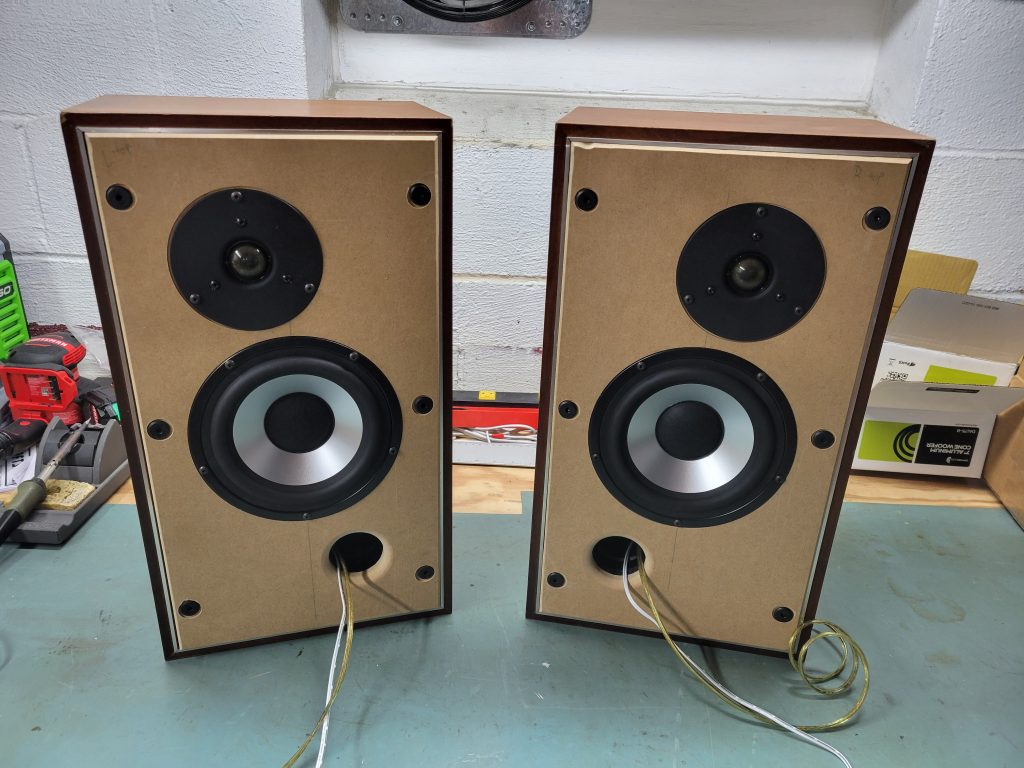
The current Dayton Audio Silky tweeters in the cabinet were replaced about 20 years ago and are still working just fine. The 1 1/8” diameter dome is able to perform to 2kHz and will transition to a 7” mid-bass easily.
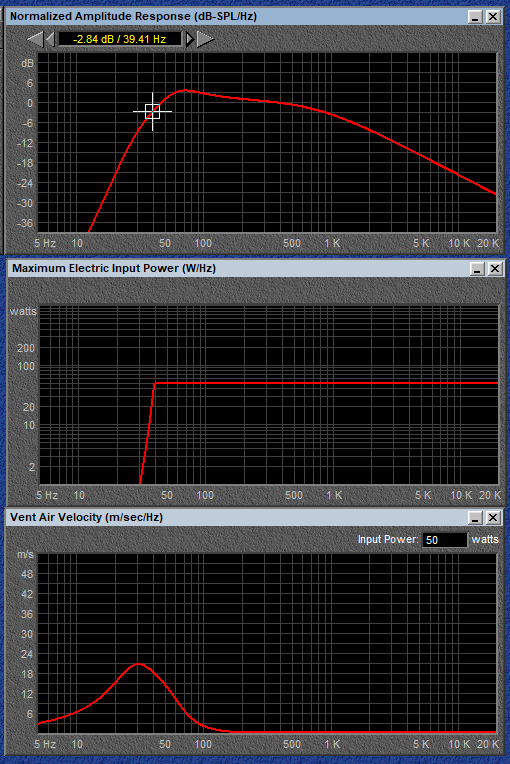
The Dayton DA175-8 was selected based on some modeling in the box and its use in the popular kit called the Hitmakers. The Bass Box model shows this woofer working well in the box and exhibiting a 3 dB boost between 50 to 100Hz. That will show up as a punchy sounding speaker for most music. This is accomplished with a low tuning frequency down in the 40-45Hz range which will allow for some extension to the low 40’s, though rolling off rapidly at that point. The thermal limit of 50W RMS is hit before any exertion limits are hit, so with reasonable amplifier power these speakers will hold up nicely.
Enclosure Design
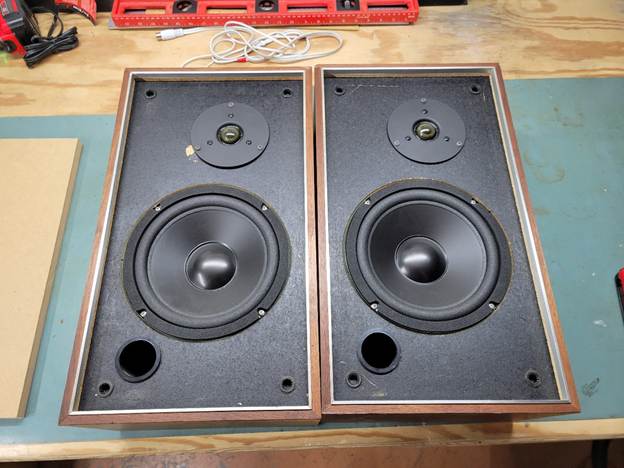
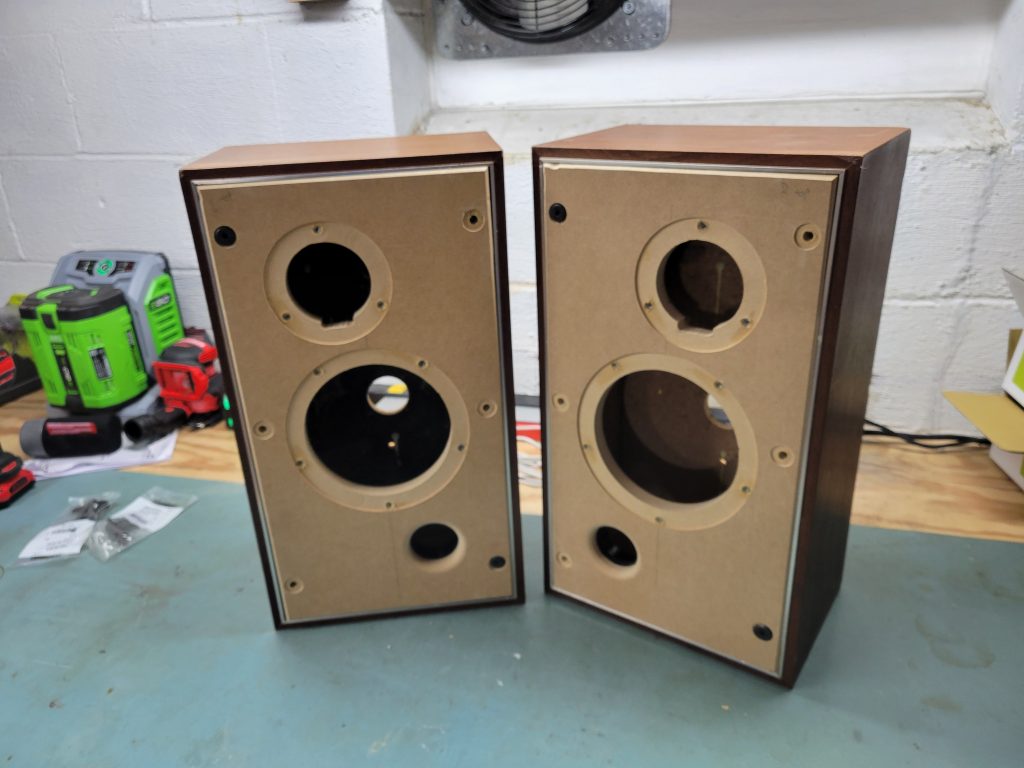
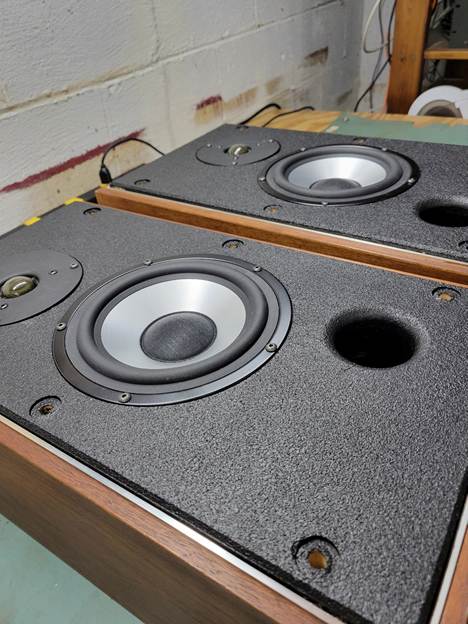
The Realistic cabinets were originally equipped with a plastic framed grille that inset just over ½” in behind an aluminum trim ring. I used a reciprocating saw to remove the original 5/8” particle board baffle. A lip of around an inch wide was left for mounting a new baffle.
The new drivers were laid out and cut into a ¾” MDF baffle board. This board, with a small chamfer to blend with the original aesthetic would be installed removably to allow redesigns later.
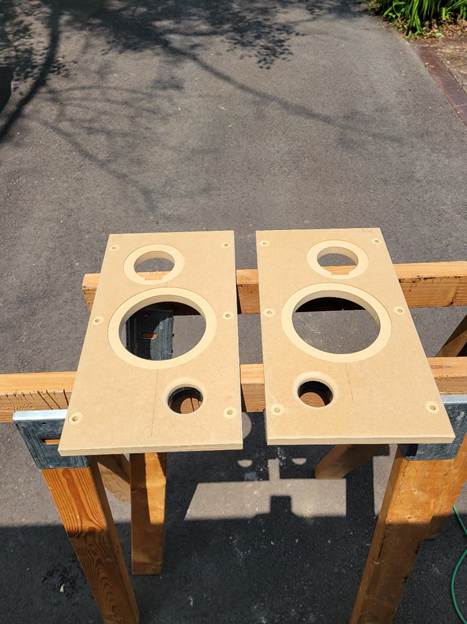
The port design will use a 2” internal diameter PVC port with a 90 degree slow sweep elbow to allow extension for lower tuning as needed.
Enclosure Assembly
Since the cabinets were already complete, the assembly was quite simple. The baffles were installed using 1/4×20 threaded inserts and furniture screws using a wide and thin weather strip for seal. The connection terminals were updated from spring style to binding posts, and the interior was lined with denim insulation I had lying about.

Crossover Design
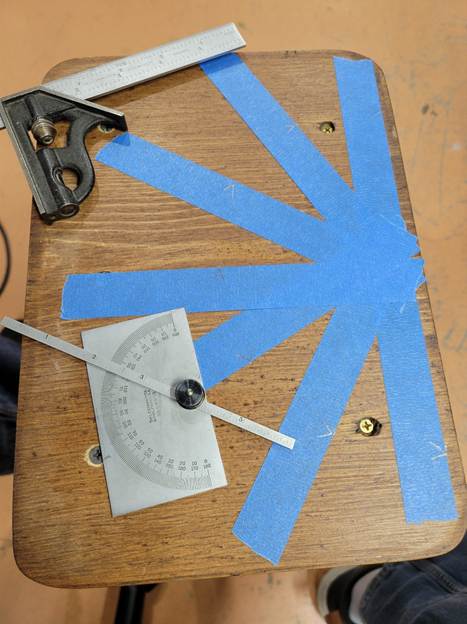
The crossover design relies on as much actual measurement data as possible to be done as accurately as possible without a lot of trial and error or subjective ear based adjustments later. To do this I utilized ARTA for measurements and VituixCAD for simulation, following the measurement guidelines and documentation available. My measurement setup uses the Dayton EMM6 microphone and a Focusrite Scarlett interface run in 2 channel mode. The main limitation is my measurement area, which is a little tight to avoid quick reflections off surfaces when doing measurements. Also, I don’t have a fancy turntable or good rotation mechanism so I stick with 30 degree increments for polar response.
The Vituix documentation leaves a lot of questions, but I have done this before for my Anarchies 3 way project so the basic data capture flow is this:
First get your impedance data saved using DATS or whatever impedance measurement jig you may have. Then make the acoustic measurements.
ARTA
- Set levels and use ARTA group record to save a bunch of “pir” files containing the impulse response data
- Repeat for all drivers
- Capture close mic response for woofer and port
VituixCAD
- Use Convert IR to FR tool to batch all “pir” files into consistent FRD files
- Use Merger tool to batch all woofer files with the close mic data
- Define your drivers and apply the response and impedance files
- Design away!
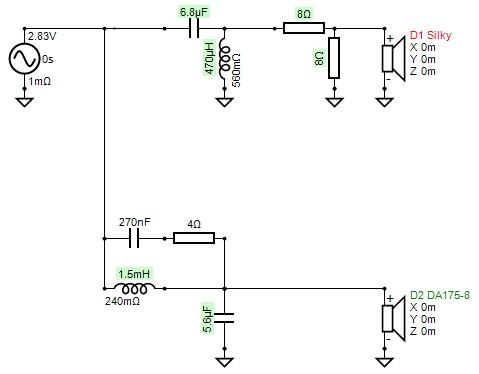
For this design I started with 2nd order electrical filters on both drivers, an L-Pad after the filter on the tweeter, and a series RC across the woofer inductor to create a tank notch filter. The values were started in the ballpark using my older Supernova Minimus design selections, a similar 2 way.
Optimizer
The VituixCAD optimizer was used to tweak values a bit. This tool is handy but needs a few settings to make it work well. It also works best if you are already in the ballpark for a crossover design. This allows you to use that as the baseline for sensitivity and the target line.
Component Selections – Only enable components that are principle crossover components, in my case the 2nd order parts L and C in the tweeter and woofer circuits without the series RC tank circuit. That part I’ll adjust based on the woofer inductor value to target the breakup frequencies of the aluminum cone.
Optimize Settings – Leaving it at 50/50 weight between Ref Axis and Sound Power is fine, but you may adjust based on your design goals. For example, my Anarchies were weighted heavily to room power response to maximize smoothness and summing off axis for their purpose in a main listening room. These Nova Hits could be used in a room or up close for monitoring a computer, so a 50/50 blend was good.
Frequency Range – Set to a reasonable range based on where your crossover is. Attempting to optimize above the tweeter’s range or below the woofer capability will result in the optimization not finishing and the outcome being pretty poor.
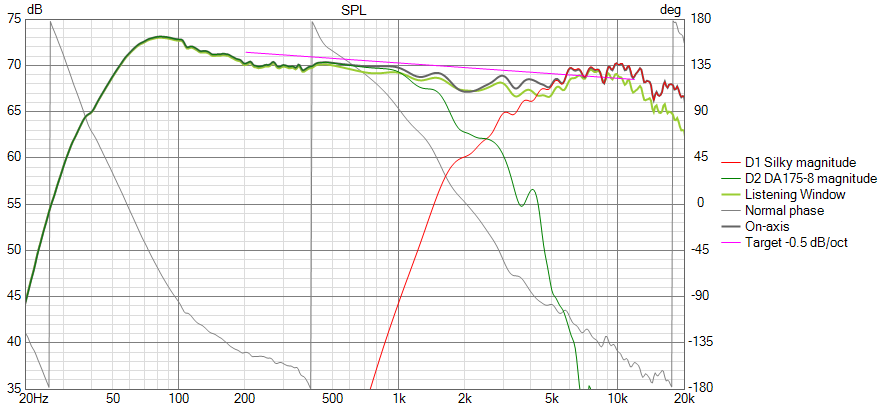
Textbook Target – SPL should land right where your chart is currently to avoid attempting to raise or lower the sensitivity too much. Tilt – This is a bit subjective, but I target a -0.5dB slope which I heard somewhere is pleasing to most people.
Running the optimizer will jiggle the lines around and likely land you pretty close to your target. Keep playing with it and running the optimizer multiple times as you wish. Regardless, some value tweaking will be needed to align with components you can find or get closer to what you want it to look like.
I did some component value adjustments using the E12 snap settings to land on values I can find. A few clicks up and down while watching the results on the charts and I landed on this schematic.
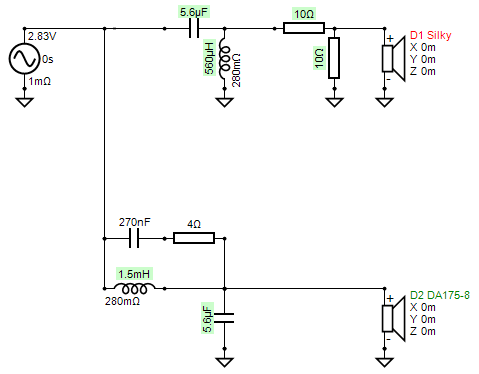
Then the values were adjusted to the closest parts that were actually available to order from Parts Express. The 10 ohm resistors were on back order, so dropping to 8 ohms for availability made a minimal change to the output. With 10 ohms resistors for the L-Pad the tweeter itself is more dominant so the drop in series resistance does add 1dB of gain to the tweeter output. This still lands near target and adds a little pre-built in smiley face EQ to the whole output while still having a slight downward tilt. I suspect this will actually be quite pleasing to listen to!
Final on axis response lands within +-3dB from 44Hz to 20kHz with that slight downward tilt and a little smiley face. The aluminum cone breakup of the DA175-8 woofer is around 8kHz and is completely off chart thanks to the tank circuit’s resonance at 7.9kHz.
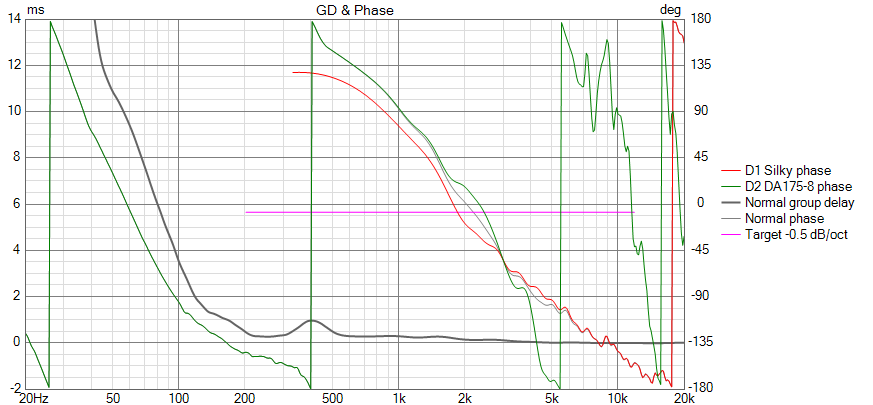
Phase tracking is good, not perfect. Inverting the tweeter results in a 15dB drop at the crossover point in the high 2k range.
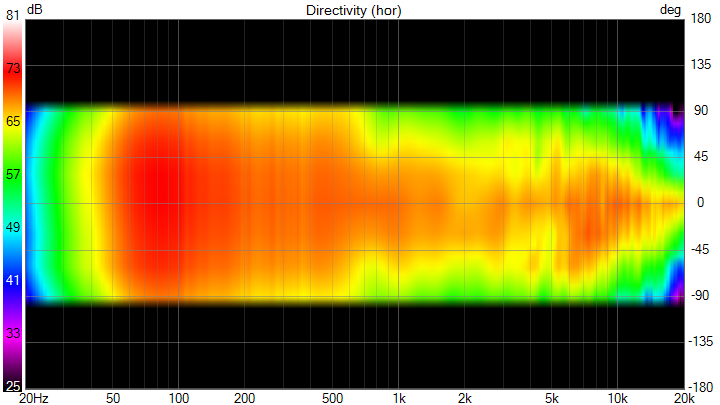
The CTA-2034 chart is good for estimating in room power response, important for far field listening and watching for “tweeter bloom” where the directivity of the woofer drops before the wide dispersion of the tweeter kicks in. Keeping that transition smooth off axis will help keep the overall perception of the speakers consistent in any room.
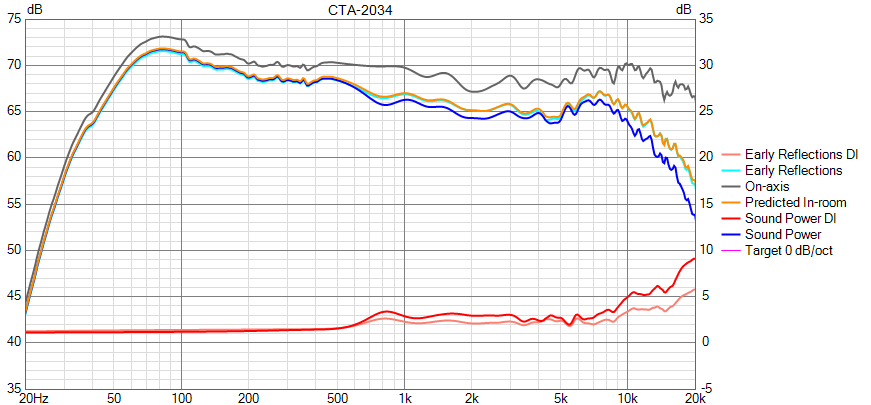
This is also displayed in the polar heat map chart, valid out to +-90 degrees where I took the measurement data. Keeping this heat map as smooth as possible across the range is the ultimate goal.
Prototype Test
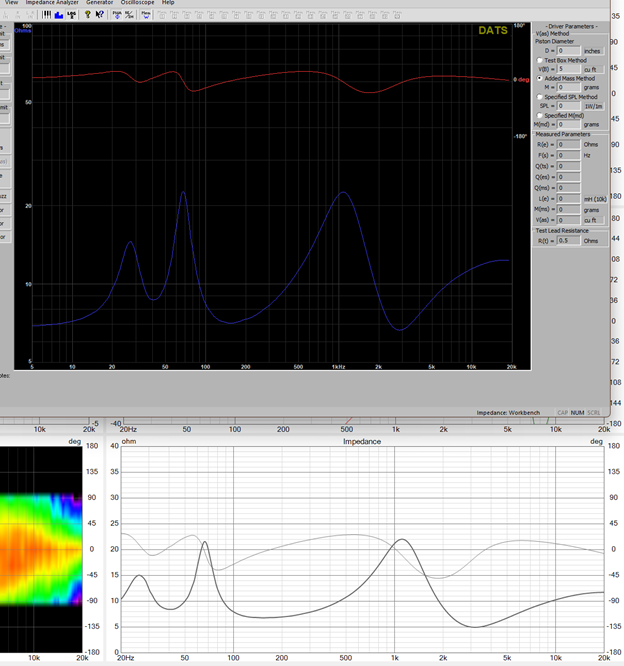
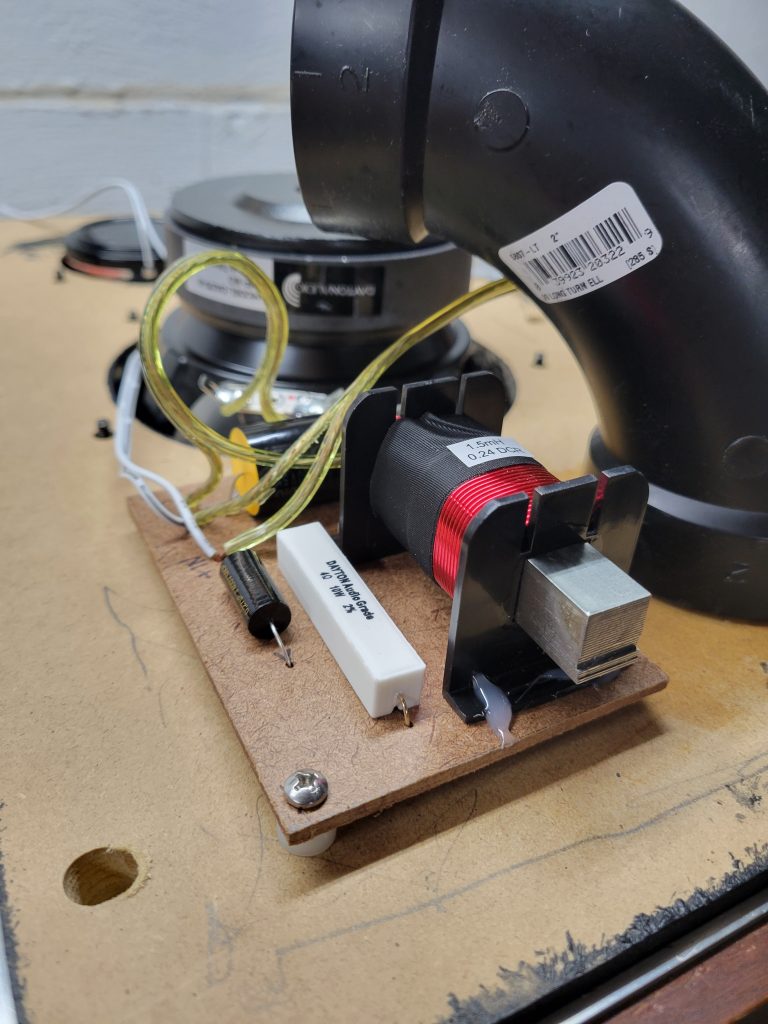
With the parts ordered and on hand it was time to test the reality against the simulations. I have a handful of clippy leads on hand to use for a quick prototype assembly on the stand. These leads are not the best and will add a little resistance here and there. In order to avoid that I often use the alligator clips to simply hold the component leads together and the wires themselves are only used when necessary. This mess came together and was tested using DATS to make sure the impedance was good before applying any power to the speaker.

The DATS sweep matched up with the simulated impedance pretty well, indicating the connections were all good.
With the impedance verified, I did a single 1M measurement on axis to compare the simulated frequency response against the actual. The measurement was gated and merged with the same near field measurements to get the whole response.
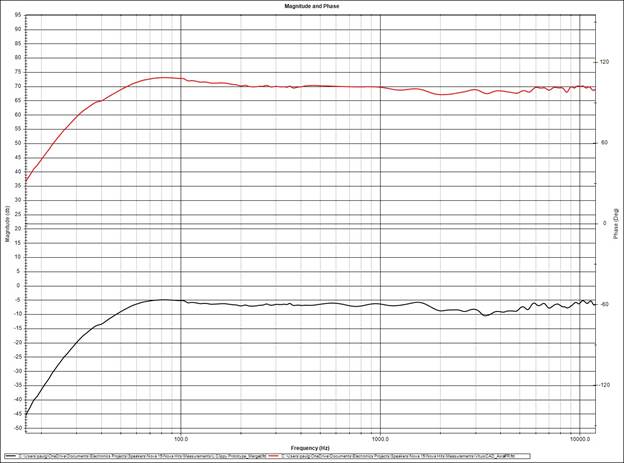
The red trace is the VituixCAD simulated output while the black is the actual as measured. There are certainly some minor differences expected, the measurements were made at different times and the exact placement of the speaker and microphone in the room makes a significant difference in the results. Additionally, the tolerances of the components and the resistance of the clippy leads will alter the crossover a bit from the simulated ideal as well. The fact that this comparison comes within a couple of dB from the simulation is amazing!
Finishing the Build
For the baffle finishing, digging out my Duratex black and applying a couple coats with the textured roller is super easy. This almost feels like cheating.
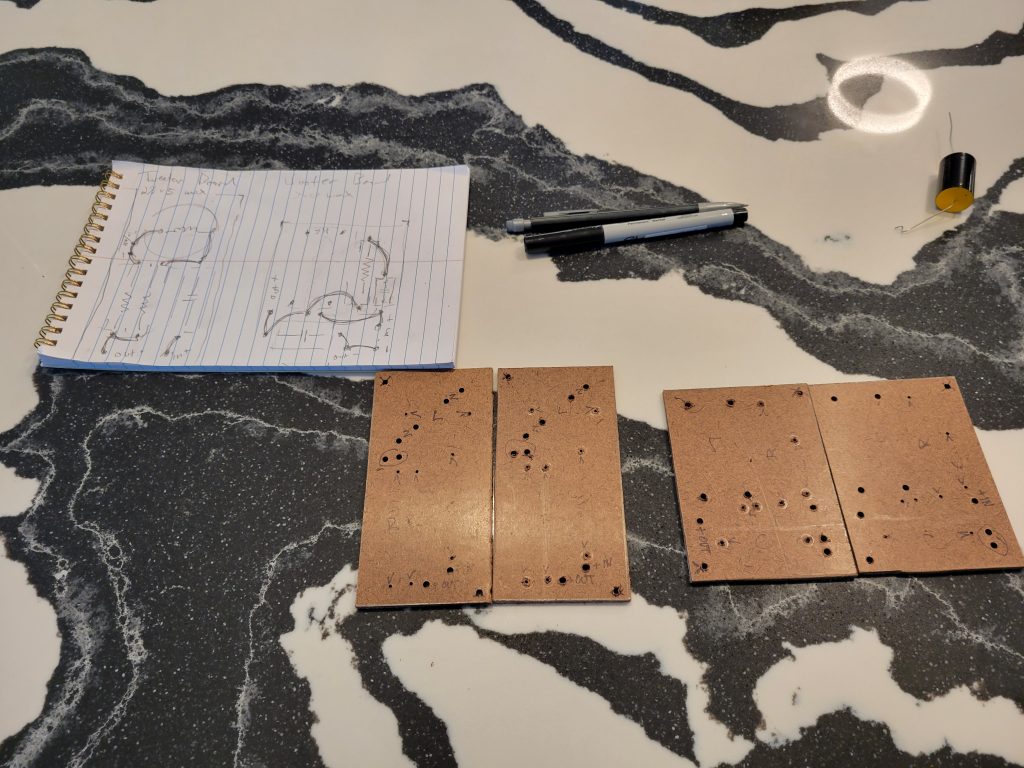
The crossover boards will be built in 2 parts to allow them to fit neatly on the back of the baffle boards. I measured out the available space and laid out the components on a piece of paper first. This translated into cuts of 1/8” hardboard for the components which were drilled in pairs for matched sets.
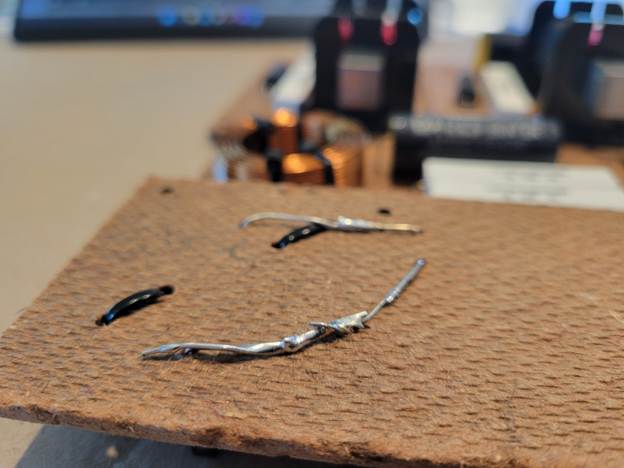
The components were then mounted and wired point to point, using the leads as the interconnects with crude overlap and plentiful solder to flow between the leads.
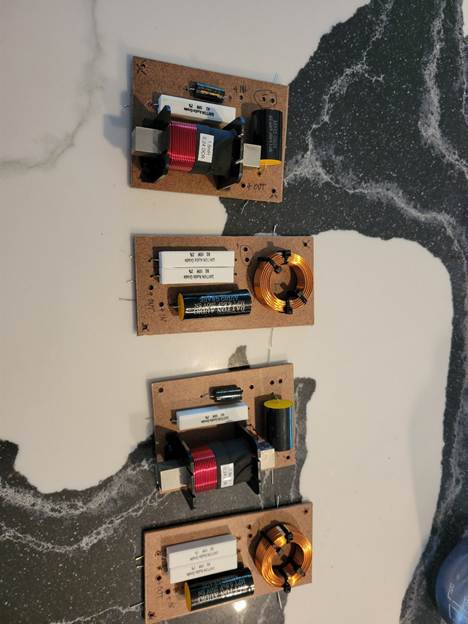
The larger components were touched with a dab of hot melt glue to add some security and the boards were screwed onto the baffle.
With everything soldered and glued into place, the speakers are complete and can be put to the test next to my prior 3 way build the Anarchies.
Conclusion
First impressions are great! These are fun speakers to listen to, punchy bass and good easy tonal balance. My song selections that have significant content below 40Hz reveal the limits of the deep bass, but rock tracks like Rage Against the Machine Take the Power Back punch with some power that these things have no right to produce.
Pingback: Speaker Fight – Anarchies vs. Nova Hits | The World of Wogg