Anarchies Finishing, Round 1

The Anarchies were finished in early 2023 with a simple cabinet treatment that was intended to be temporary until the time and resources were available to do a more complex gloss finish. It has been a couple years now, and the time to execute the proper finish hasn’t happened so this is how they were completed and put to use!
Refer to the earlier posts about these speakers for all the details of the concept and design.
Start with the Baffle
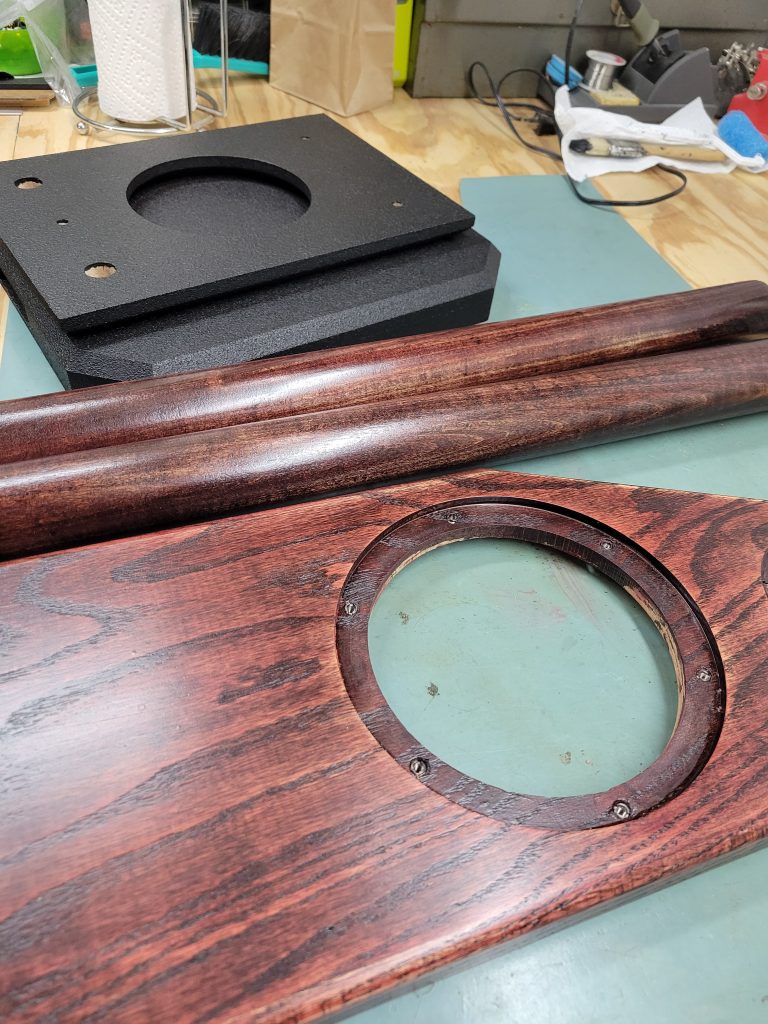
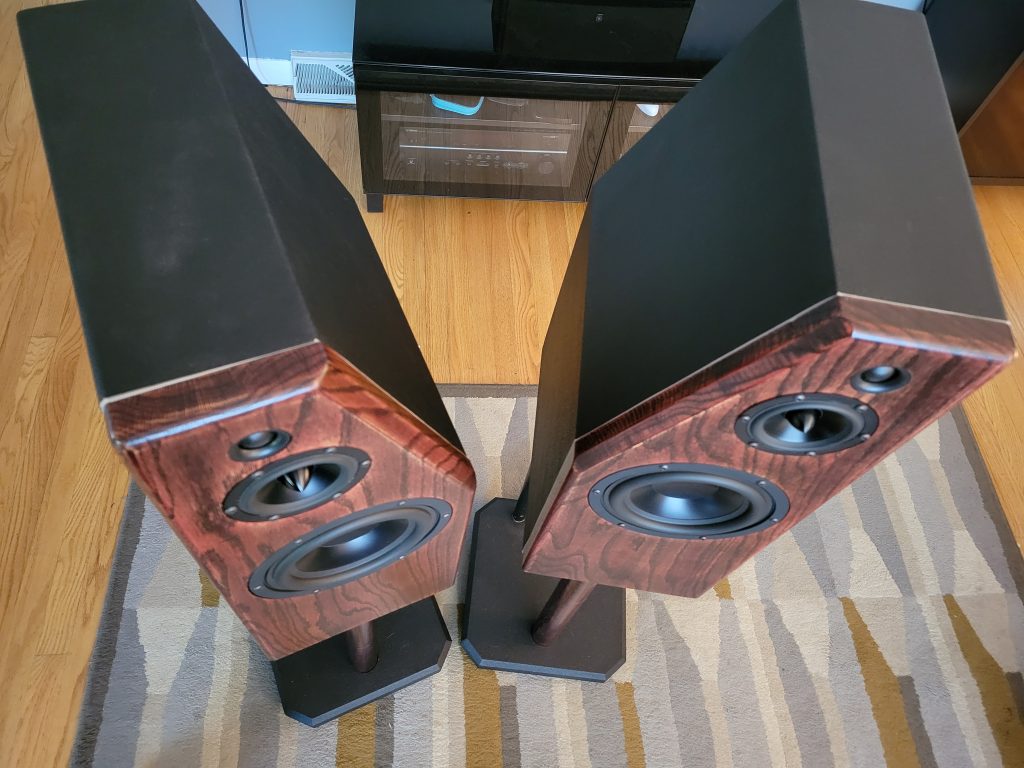
The look of any speaker is largely defined by the baffle. The Anarchies were constructed with a removable solid hardwood baffle on an MDF shell, so after the design was validated the speakers were disassembled for finishing. For the final product I prefer some natural wood and with my choice of solid red oak for the material it was a matter of deciding how to best use that wood for the look I wanted. I also tend to prefer darker finishes, and for this one I wanted to take a step away from a plain wood finish and add a little color. For color I wanted to lean into a black with red hue vibe so the baffles were going to lean into that red color. I did some testing on the spare oak board, looking for the proper mix of Minwax colors and dye that would add some depth to the color of the finish.

Ultimately a pre-treatment of straight red RIT dye followed by some dark Minwax stain came out on top and the baffles were put into process.
First the red dye.
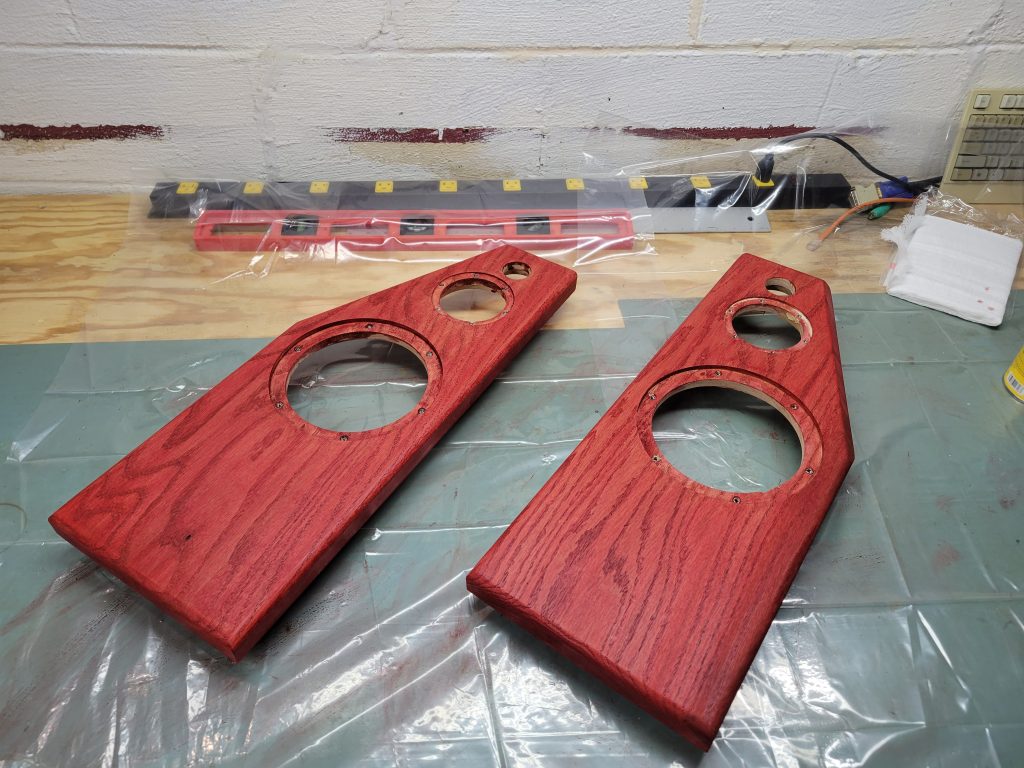
Then the stain.
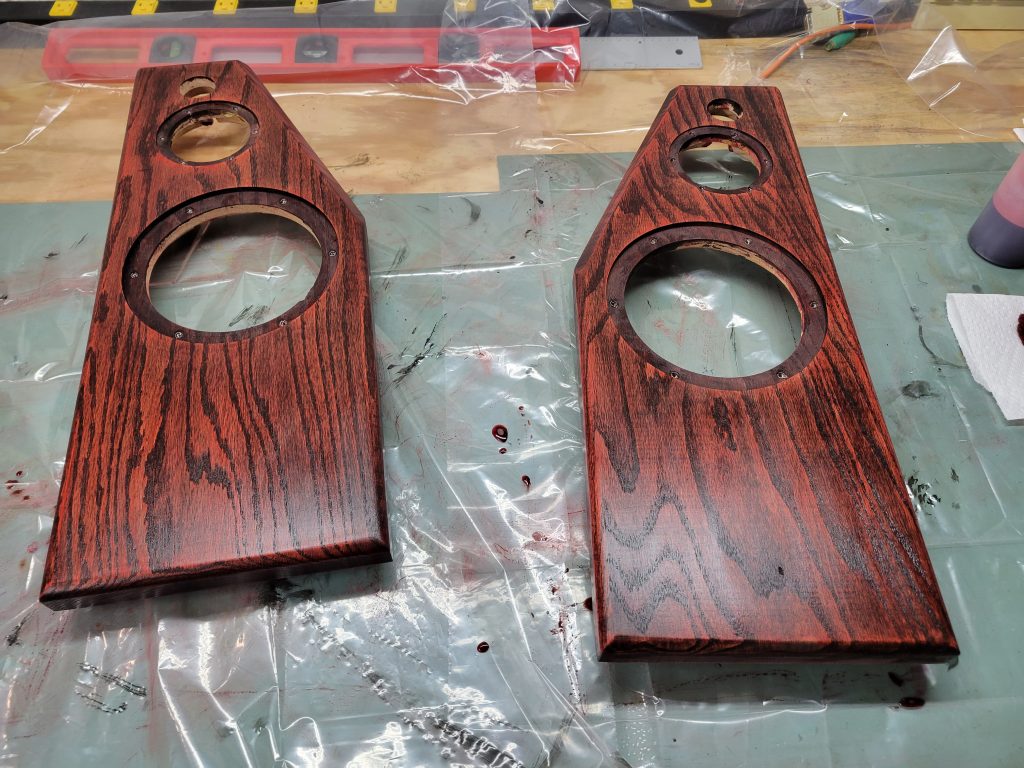
I ran into a little hidden trouble where some glue or oils messed up the even penetration of the stain. This had to be dealt with by sanding and re-processing the area until I achieved the even finish I was looking for. In previous projects, this oops then repeat finishing activity actually leads to a deeper and richer finish with little imperfections that I think add to the bespoke nature of the DIY work, so I’ve opted to lean into the imperfections instead of constantly trying to achieve perfection.
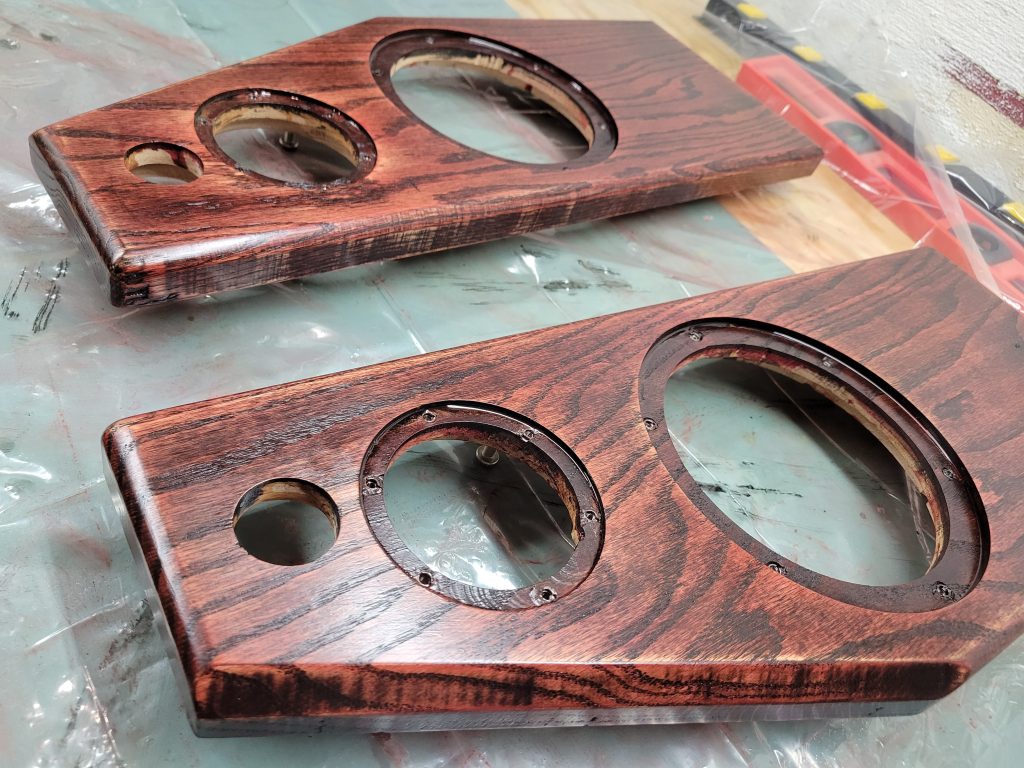
A few coats of polyurethane later, the baffles were looking good. Definitely a little rustic on the finish quality, but I decided to leave that as intentional.
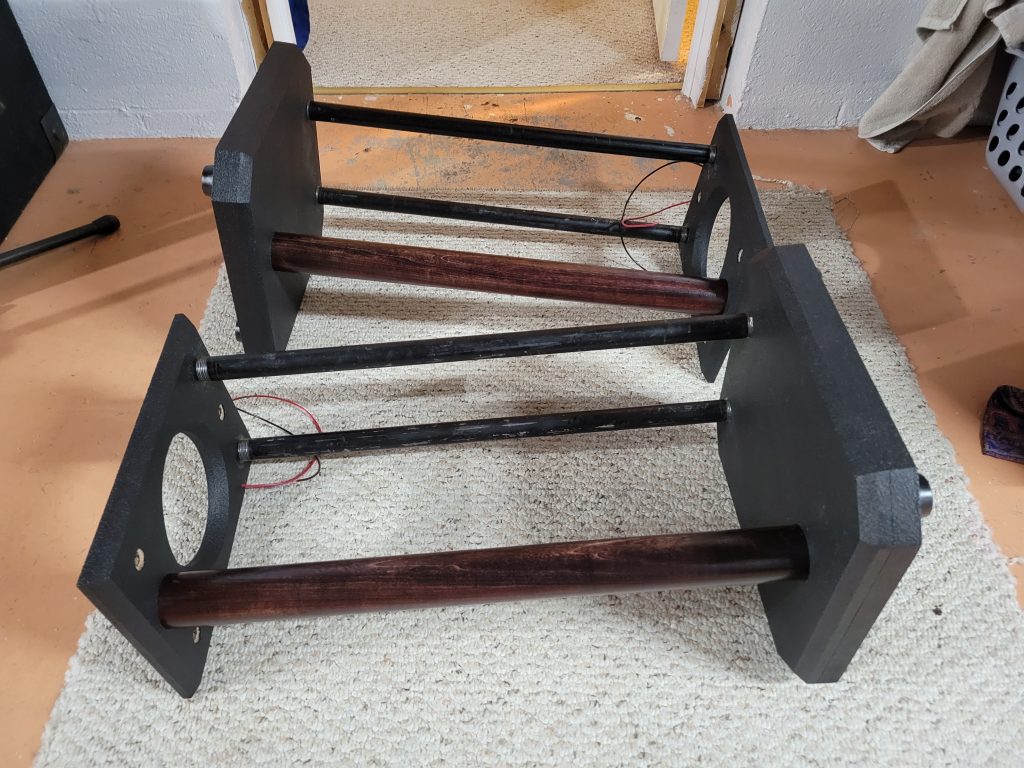
Integrated Stands
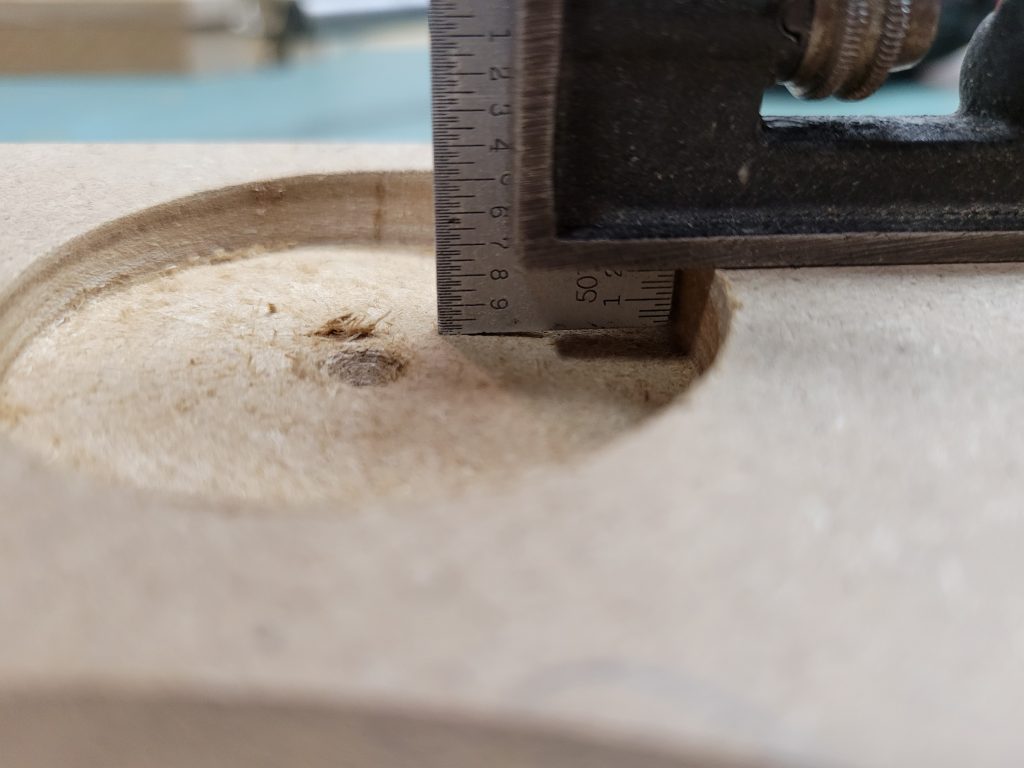
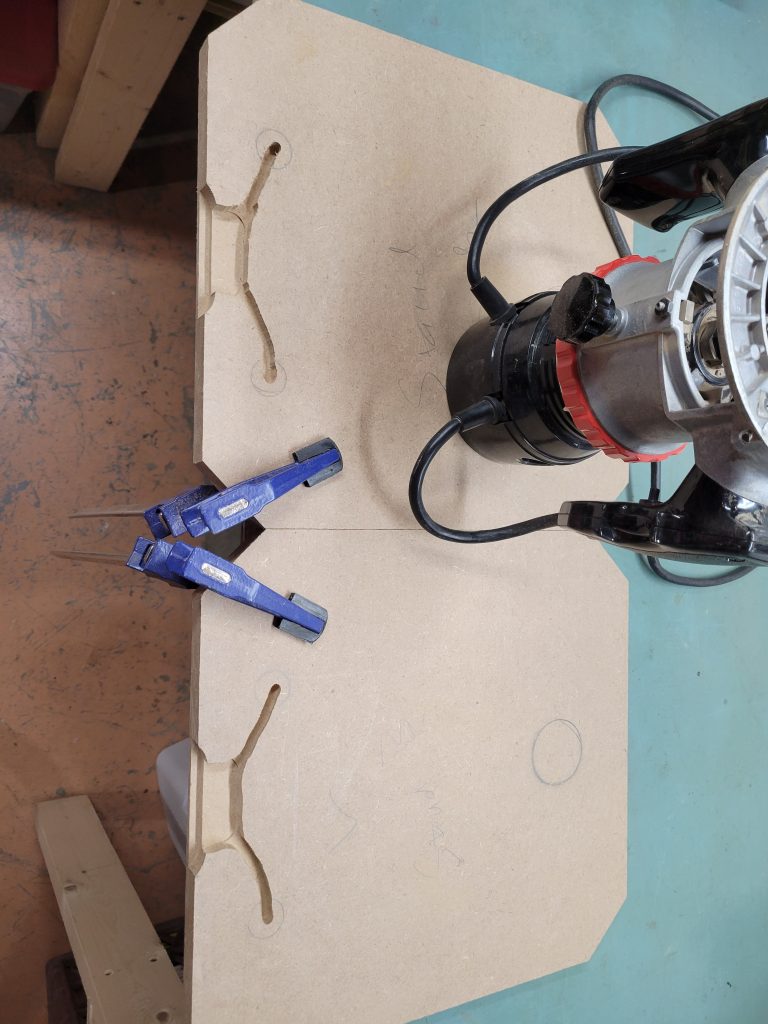
With the down firing port and plans for integrated wiring, the stands needed to be crafted to match and mount to the cabinets. The top panels of the stands were rough cut out first. I’m using triple 1/4×20 mounting hardware for each, complementary to the stand’s tripod locations. The panels were bolted in place to lock in the locations of the ports, tripod locations and wiring before drilling all the pilot holes.
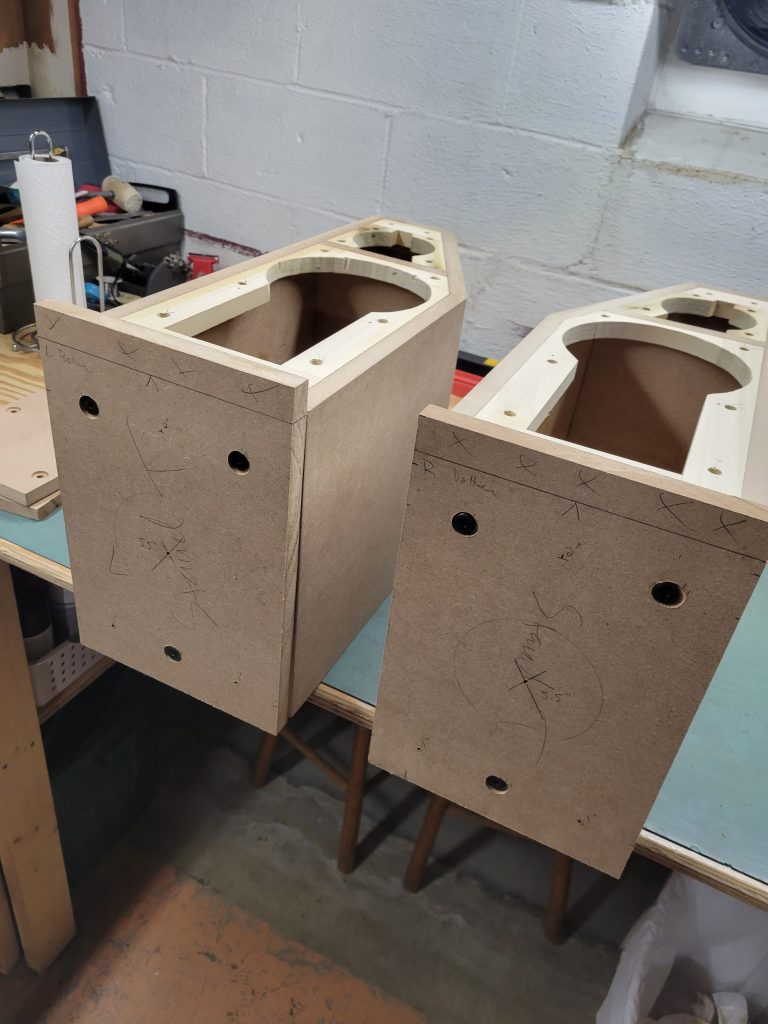
The holes for the wiring were drilled through both the stand and cabinet at the same time to ensure alignment. The top panels were then flush trimmed with the router, and the port clearance holes were made oversized to land outside the Precision Port flare. I added a little 45 degree chamfer to finish it out and ensure there would be no tuning changes at all due to the extra thickness of the stand boards.
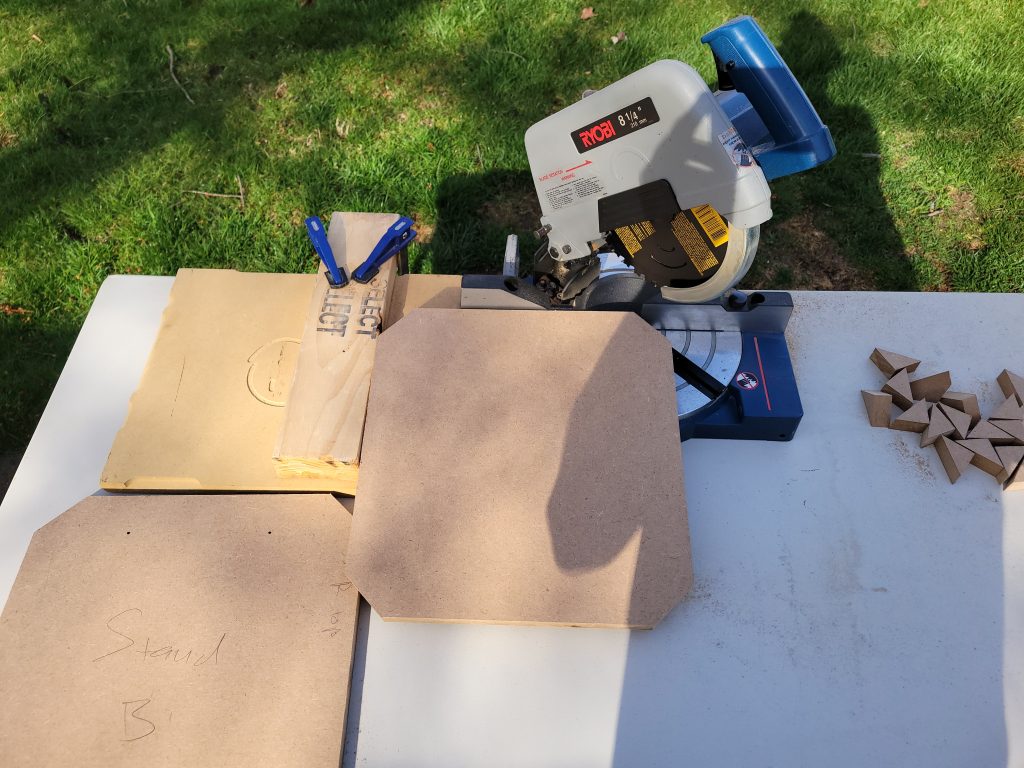
For the bottom of the stands, I went with a double thick ¾” MDF structure where the wiring would be run through channels routed into the boards before being glued together. I finished these with 45 degree cuts off the corners using a clamped on stop with the miter saw to ensure consistency.
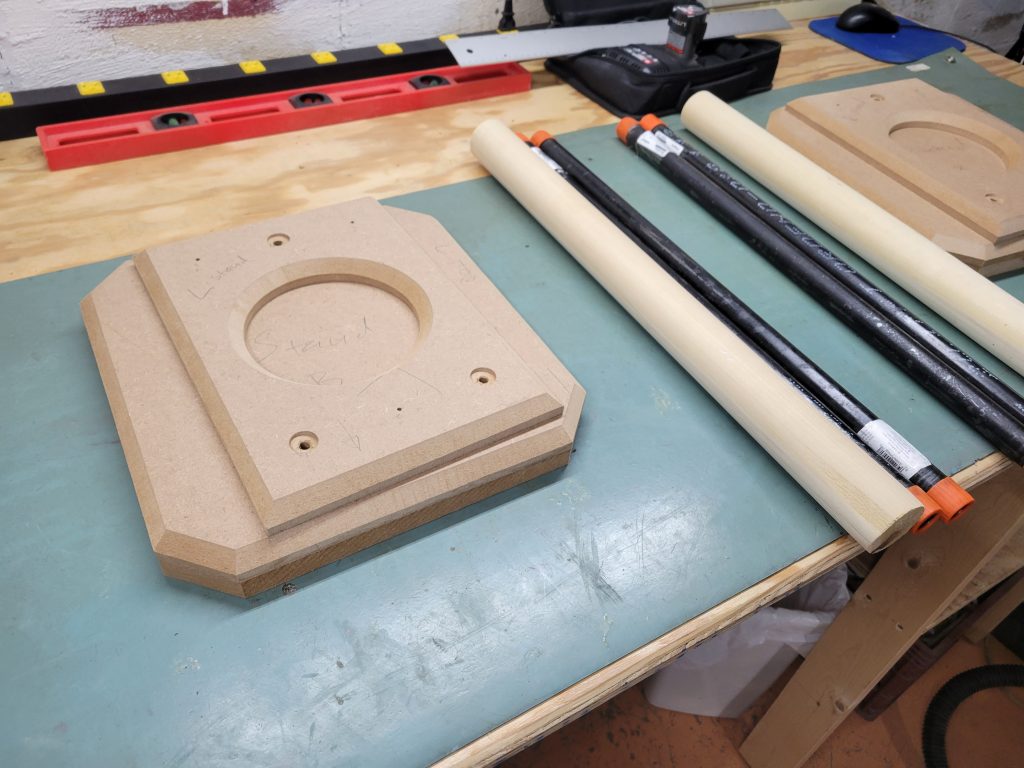
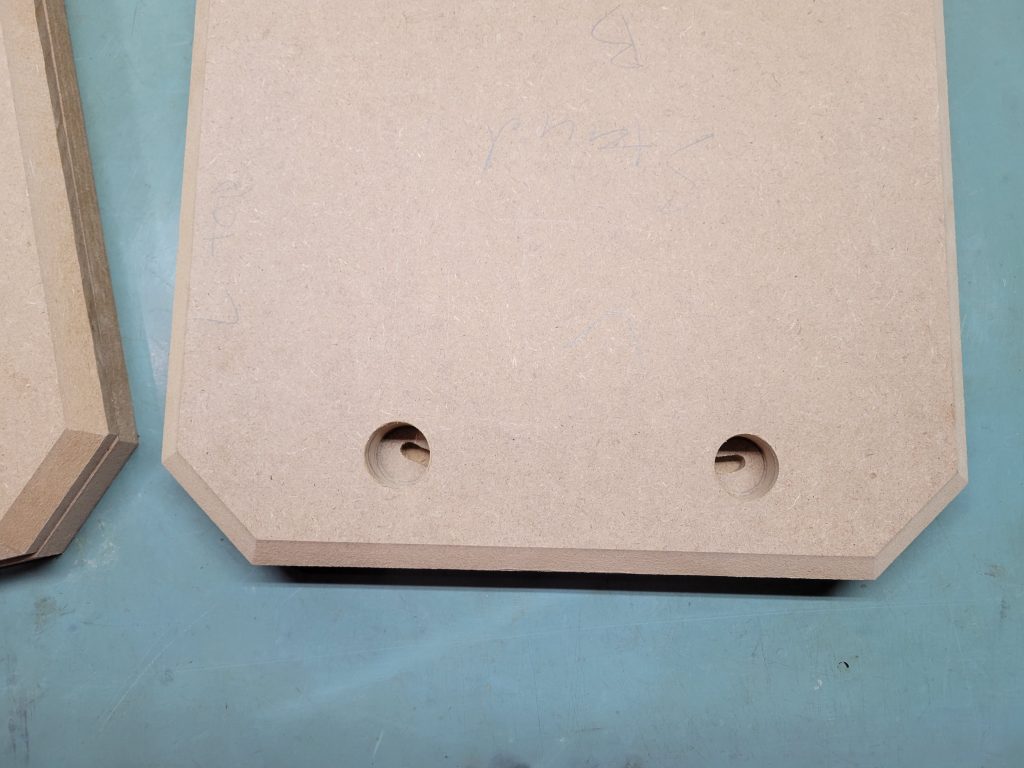
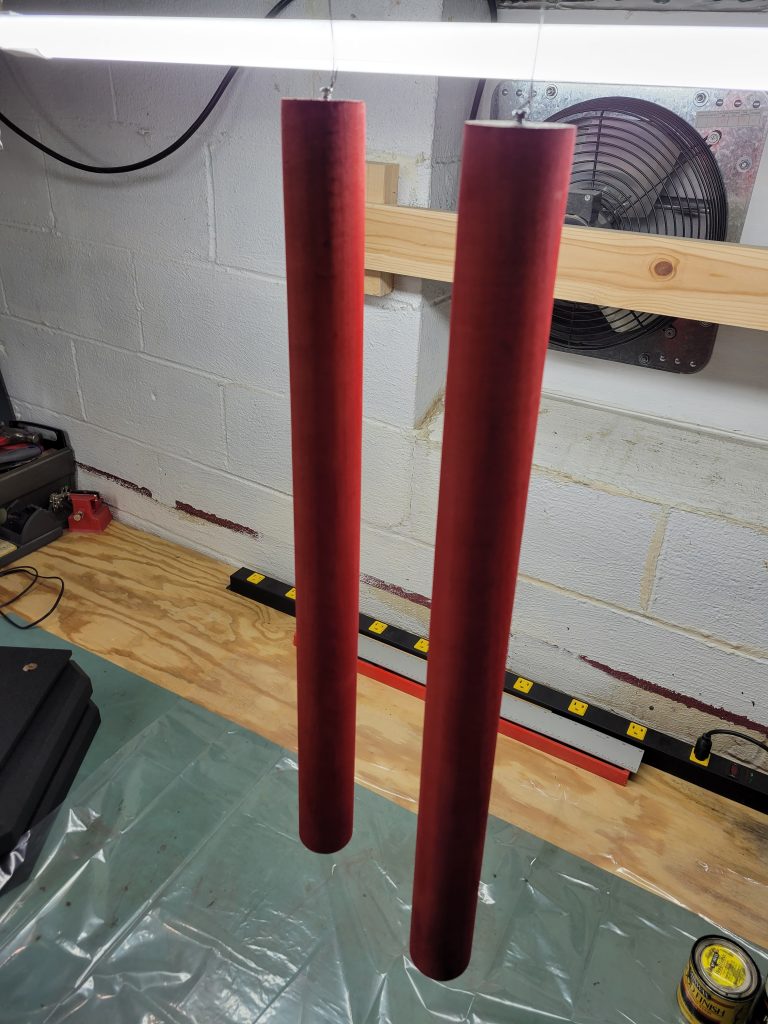
With a pile of completed stand boards, I needed to install the pipe and dowel to make them to height. The pipes dictated the stand height, and using Forstner bits I bored the holes for them watching for the correct depth to match the 3 supports and ensure the whole thing ended up level.
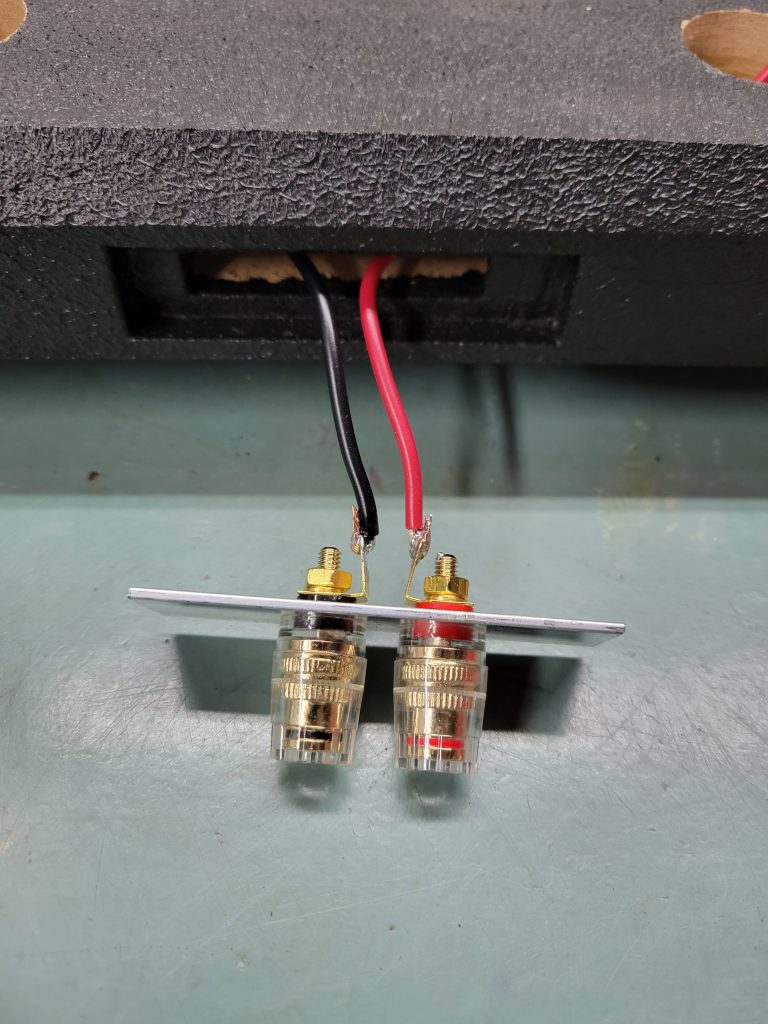
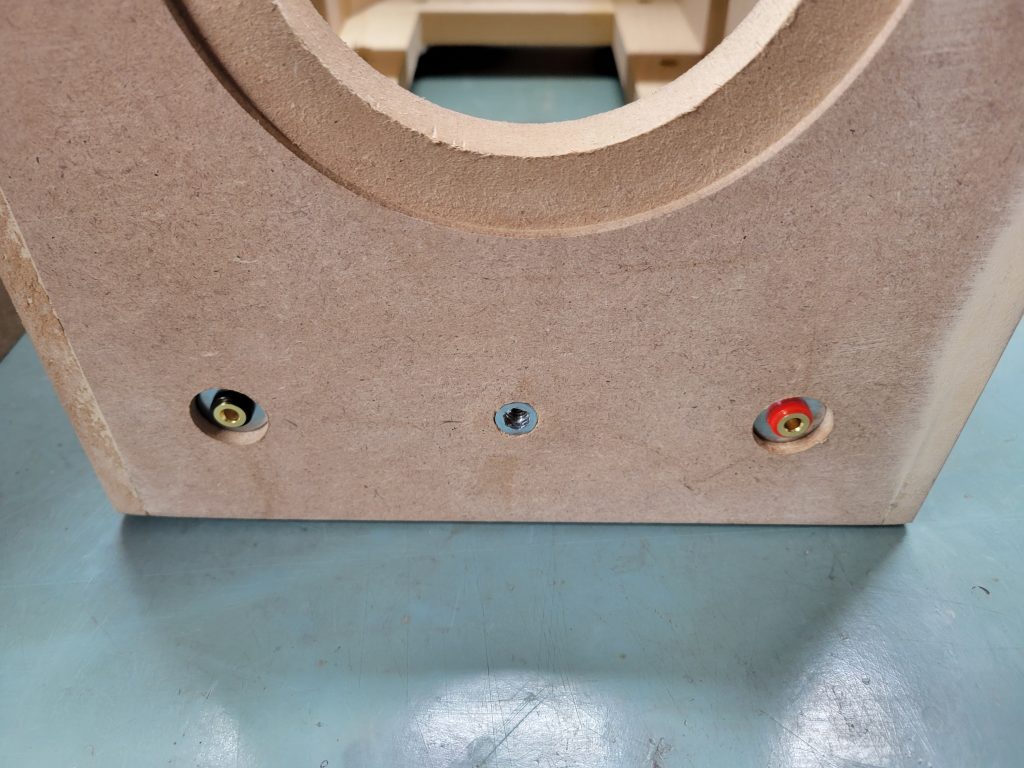
For the bottom, I had 1.5“ of thickness to play with and used a rabbet bit to carve a little recess for the terminals. The top board has a finish chamfer, so the terminal have to be offset from center just a little so the depth of the rabbet bit in the router was adjusted to compensate.
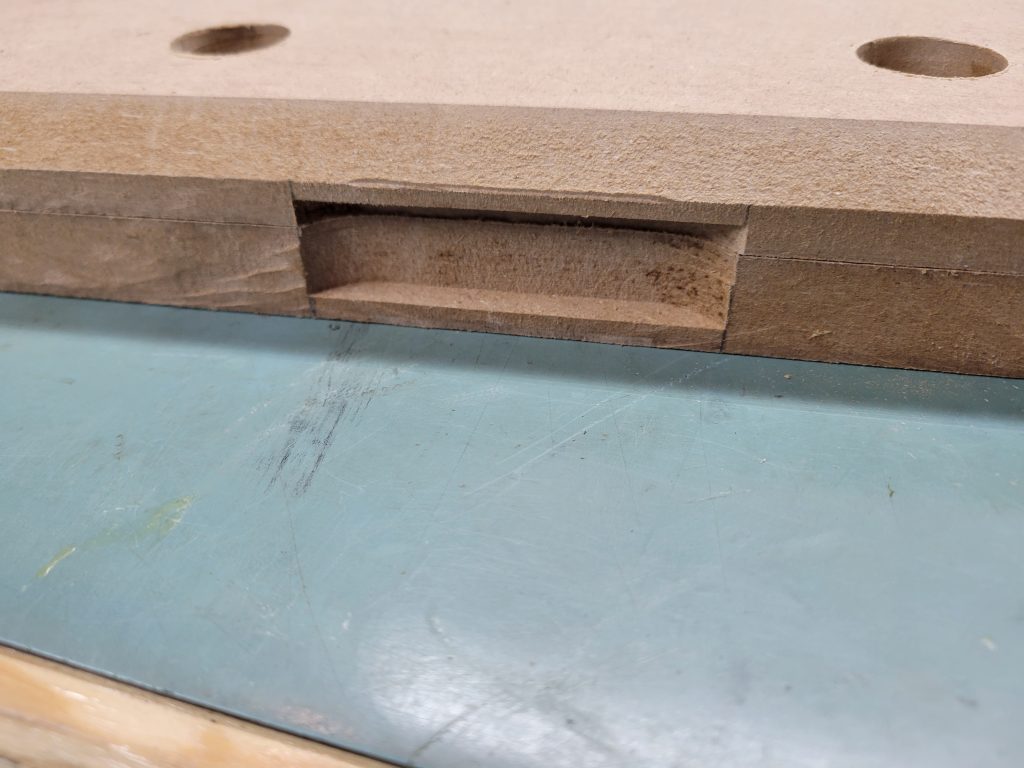
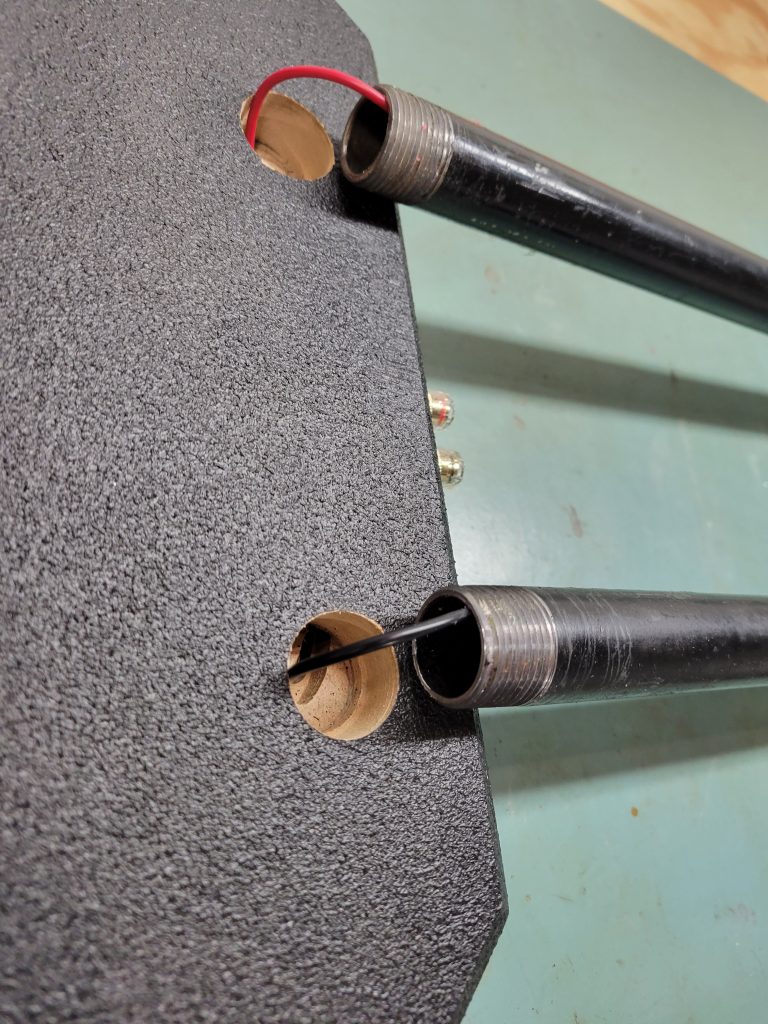
I then used a ¾” and ¼” straight bit to route out the channel for the wiring to make it to the center of the steel pipes at the back of the stands.
With the 2 boards stacked, the channels are invisible and the wiring will travel right up the pipes to the speakers.
Just a few compromises
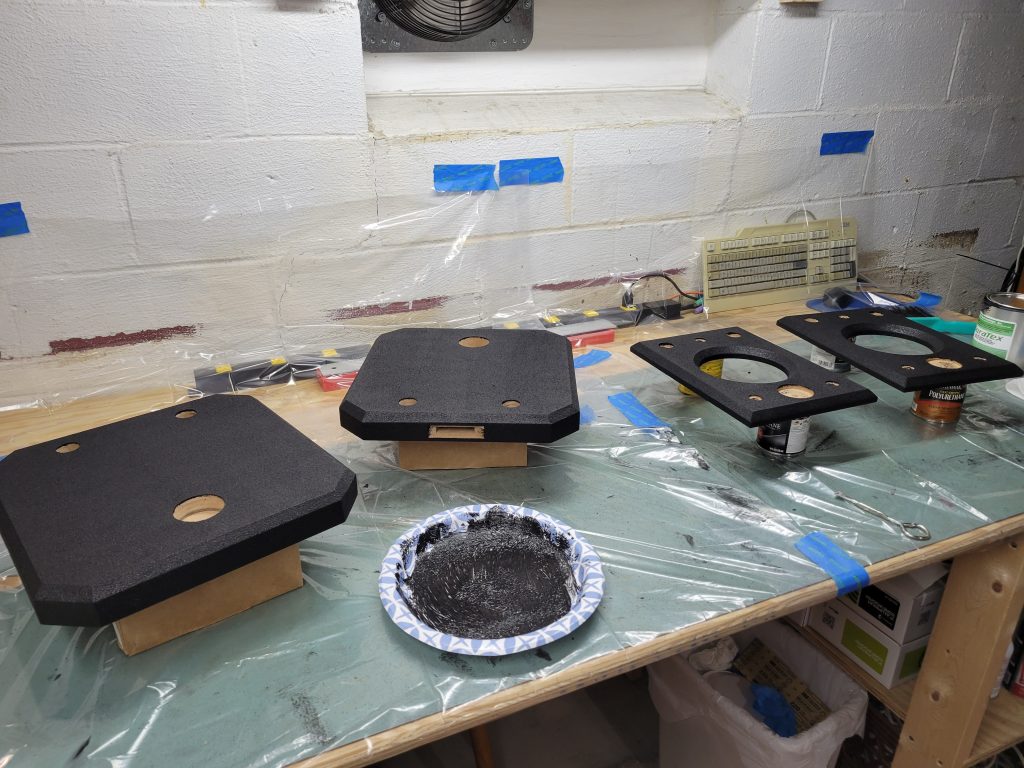
The aesthetic design I wanted included some custom color wet sanded glossy finish on the cabinets that I simply ran out of time and energy to complete. Instead, I used a simple black Duratex finish to get these done in time for a speaker gathering. In the future, the Duratex will actually make a decent sealer and primer for the future finish.
For the 1” dowel front support, I hung and stained them to get close to the baffle color using the same RIT dye and stain technique.
Finally the stands were assembled with the creation of the connection terminals using ¾” aluminum stock for mounting and 16ga wires routed through the wood and up the pipes.
The pipes themselves were a snug fit in the bored holes so they essentially threaded in and strengthened with some epoxy.
The stands were glued and assembled, then set on the ground to ensure the top and bottom were aligned while the glue set.
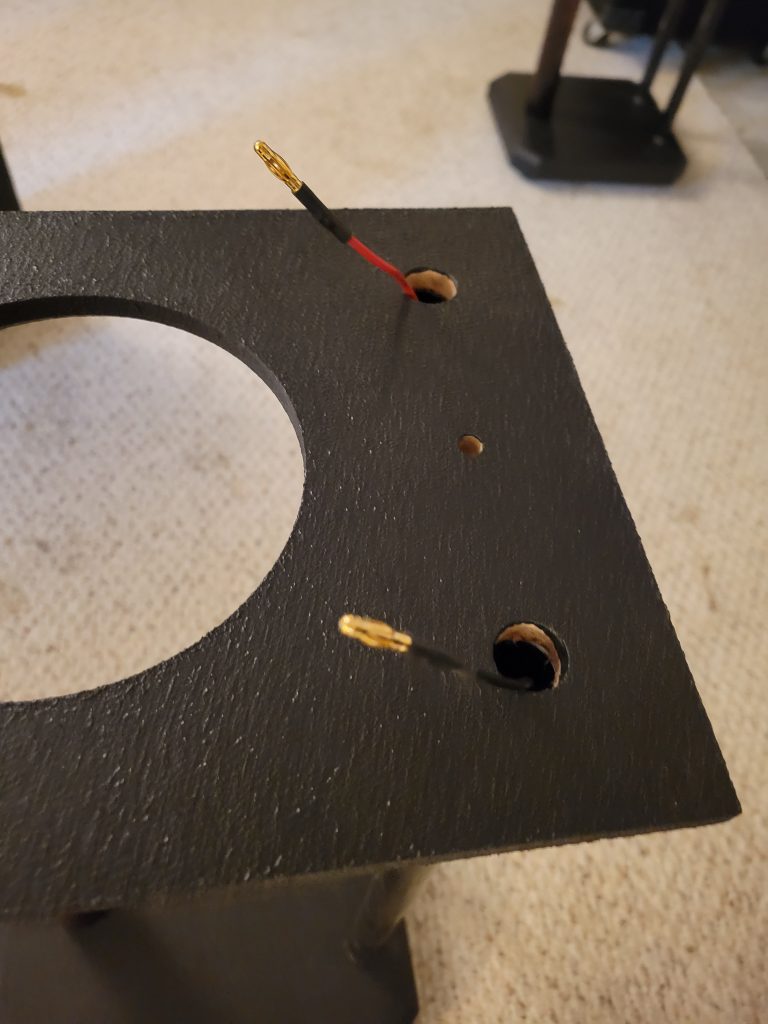
For the wiring connection into the cabinets, banana jacks were recess mounted using washers right at the point the stands hit.
These will allow quick disassembly of the stand / cabinet combination with reliable connections to the speaker.
Crossover Construction
The boards were planned out on paper and split into 2 assemblies to fit into the enclosure. Using 1/8” hard board, matching sets were drilled out in reality and the components fit through and wired point to point.
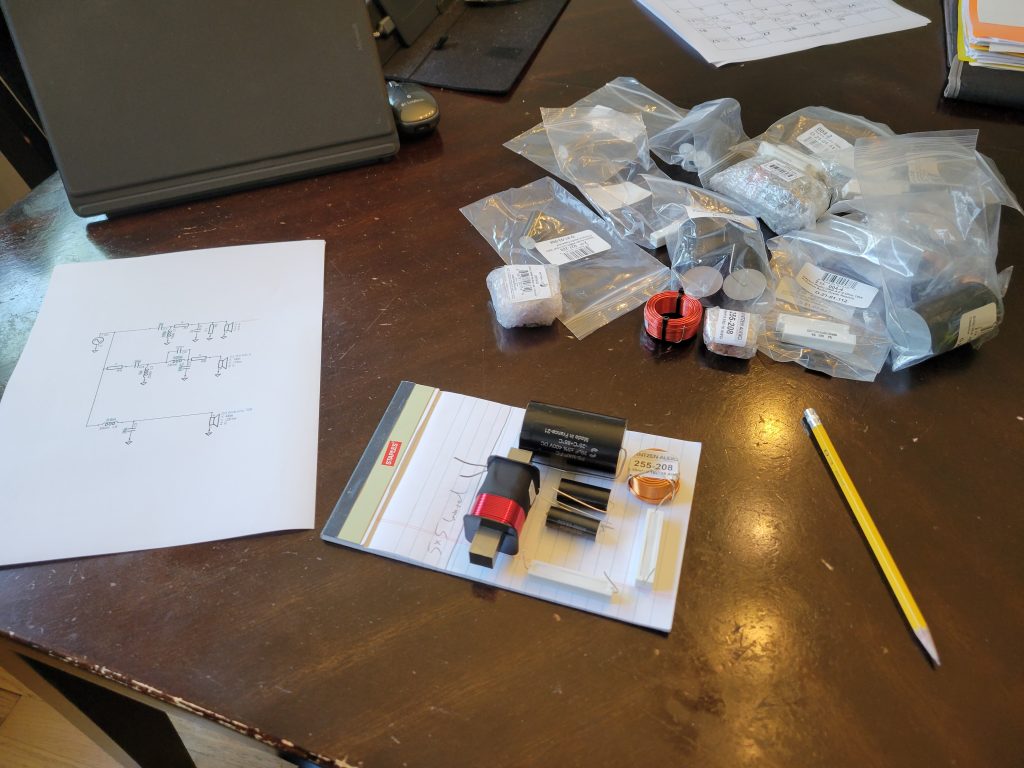
I use the component leads themselves to make the connections, soldering them together as I go.

A little dab of hot melt glue helps holds everything together instead of relying on the leads themselves.
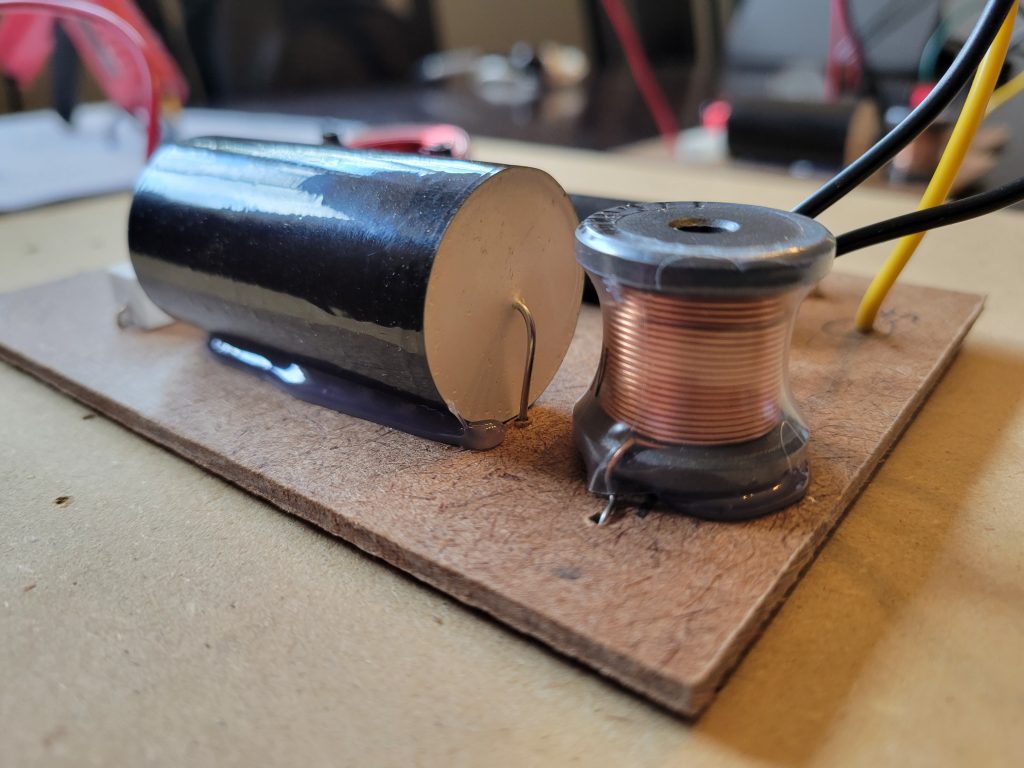
For this build, I decided to use crimp on bullet connectors on all leads to ease assembly a little and allow me to remove them later if needed. This was a bit of an organization challenge in the smallish space.
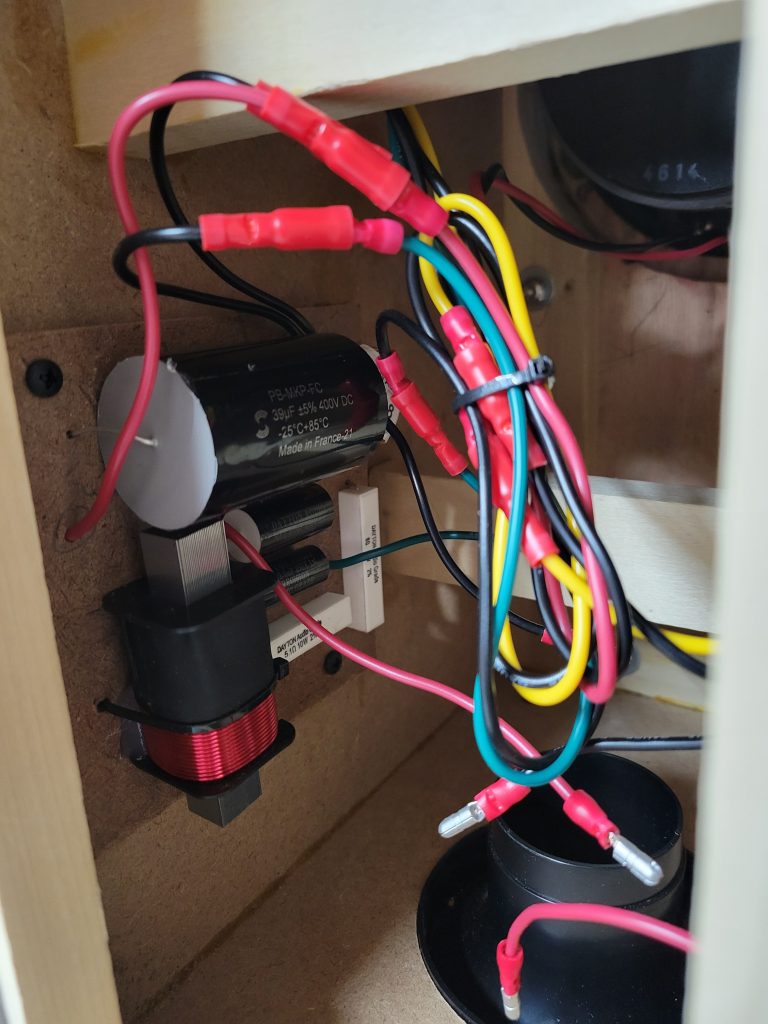
Strategically placed denim insulation was added and the cabinets were ready. The minimalist banana plugs were added to the wire at the top of the stand, allowing plenty of space for them to hide in the pipes after connected.
Final Fit (for now)
The stands when bolted on align perfectly with the bottom firing port.
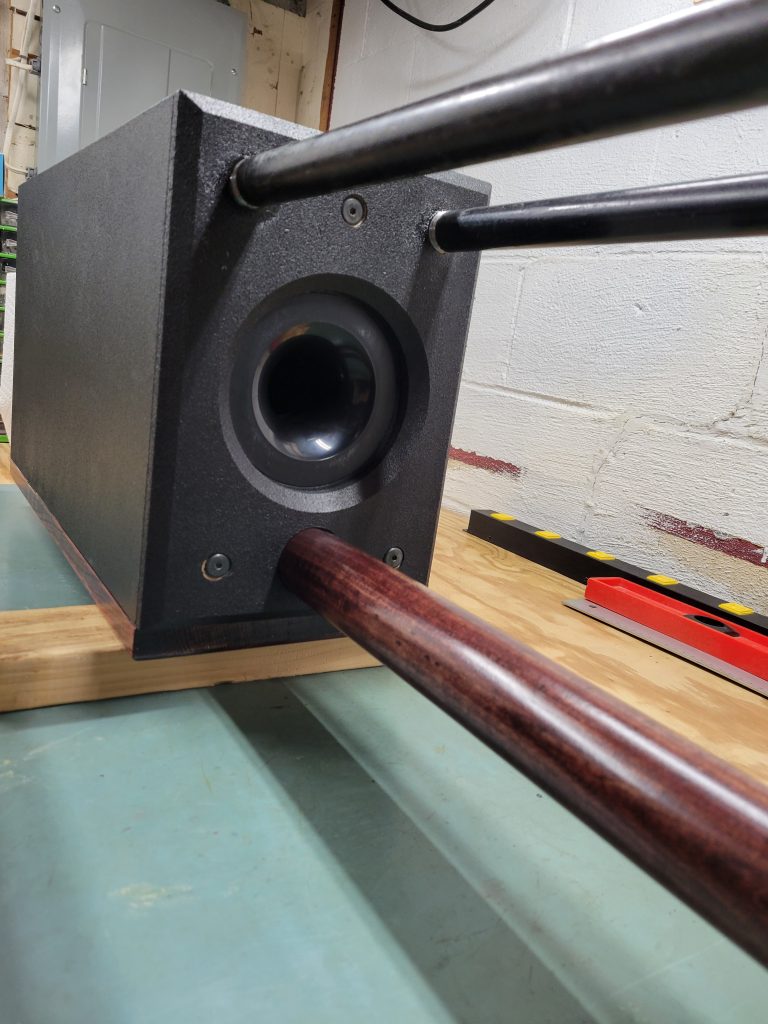
For now the finished product is pretty solid. There are some imperfections in the build and I’m not super thrilled with the simple Duratex cabinet finish. These are however simply aesthetic considerations, the performance of the speakers is unaffected and damn these things sound good.
Finished Response Validation
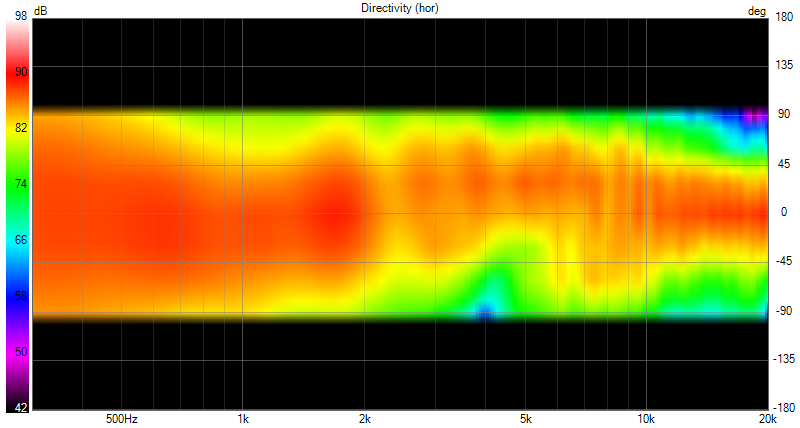
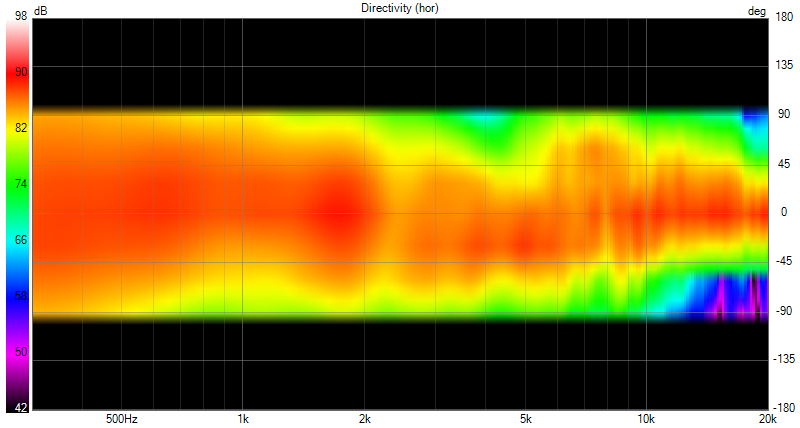
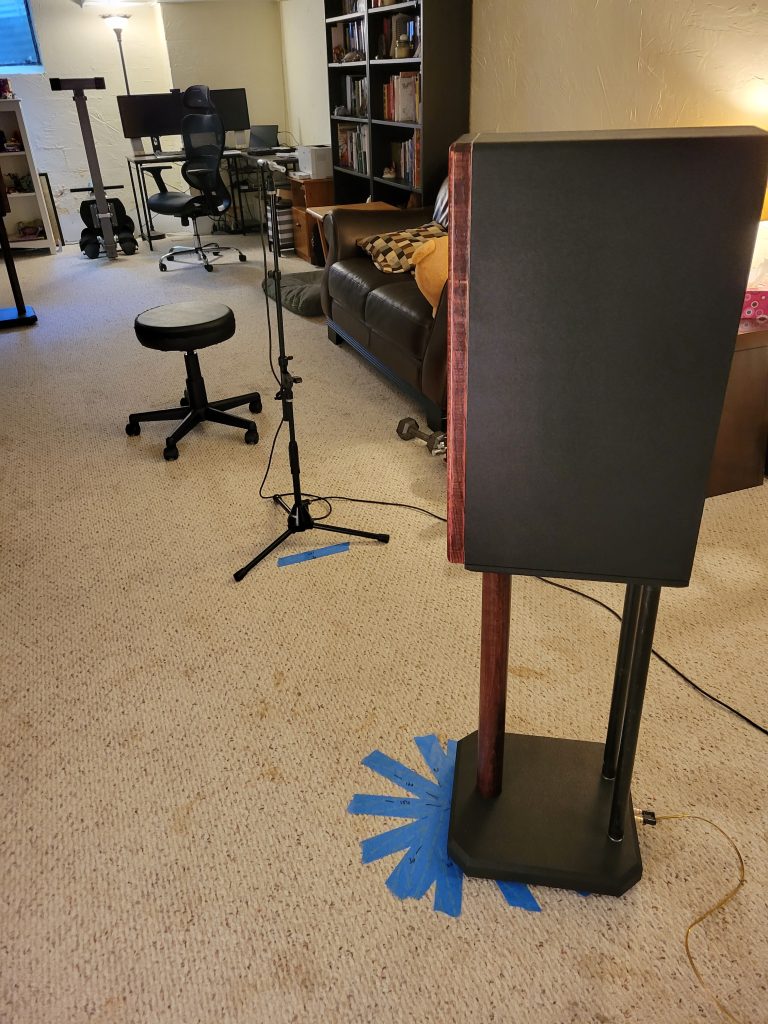
To check the final output of the system I did a full polar measurement of the completed speakers to compare against the simulation and see how close they landed in reality.
The on axis responses show a match between L and R speaker with less than 2dB difference up in the 8-10kHz range. The black trace is the L speaker, the red is the R speaker and the blue is the output from VituixCAD simulation.
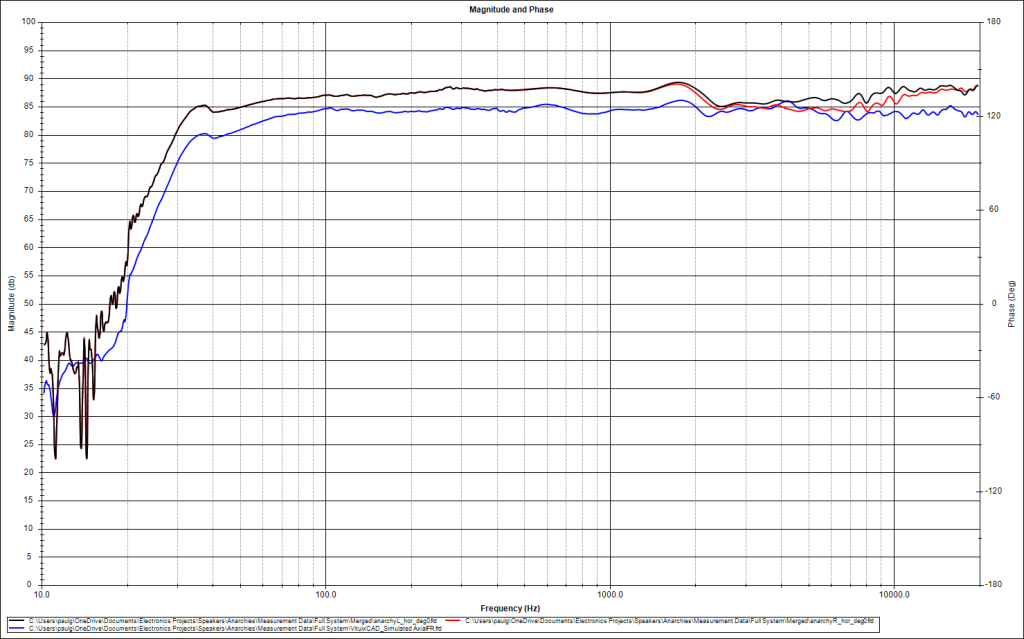
When comparing against the simulated output, there are known issues that will cause differences including mic and speaker placement in measurement space and the stack of tolerances for all the actual components used in the build. Ignore the couple dB mismatch in the level below 1kHz, these measurements are not calibrated and contain manually entered offsets, so let’s pretend the traces are aligned below 400Hz where the near field measurements take over and compare the shape. Generally, the simulation didn’t quite show the 4dB drop at 2kHz that is apparent in the actual measurements. They return to level at about 10kHz, indicating the midrange crossover network and transition to the tweeter have some differences from the simulation. The difference is only about 2 or 3 dB, so I call this a win!
With a full +-90 degree of measurement data I checked the polar response as well. This shows the expected complementary tilt in the polar response due to the 15 degree tilt of the drivers and the asymmetrical baffle.